To deposit USDT on Bybit is not difficult. You just need to be careful not to make a small mistake.
This step by step guide explains how to safely deposit USDT on Bybit. You’ll also learn how to choose the correct network and avoid common beginner mistakes.
After the main steps, I’ll show you two quick examples. One shows how to send USDT from Binance to Bybit, and the other from Trust Wallet to Bybit. These examples will help make the process easier for you, no matter which wallet or exchange you’re transferring from.
What You Need Before Depositing USDT on Bybit
To deposit USDT on Bybit, you need:
- A verified Bybit account
- USDT in another wallet or exchange (e.g., Binance, Trust Wallet)
If you don’t have a Bybit account yet, create one here. It takes about 5 minutes to sign up and verify.
How to Deposit Usdt on Bybit as a Beginner
This guide will show you how to deposit USDT on Bybit securely.
Step 1: Log in to Bybit
First, log in to your Bybit account. If you don’t have one yet, you’ll need to create an account before depositing USDT. You can follow my detailed step by step Bybit account creation guide, then come back and continue.
Step 2: Go to the Deposit Page
Next, on the top right of your Bybit homepage, click Deposit. You’ll be taken to the Bybit crypto deposit page, where you can select the coin you want to send.

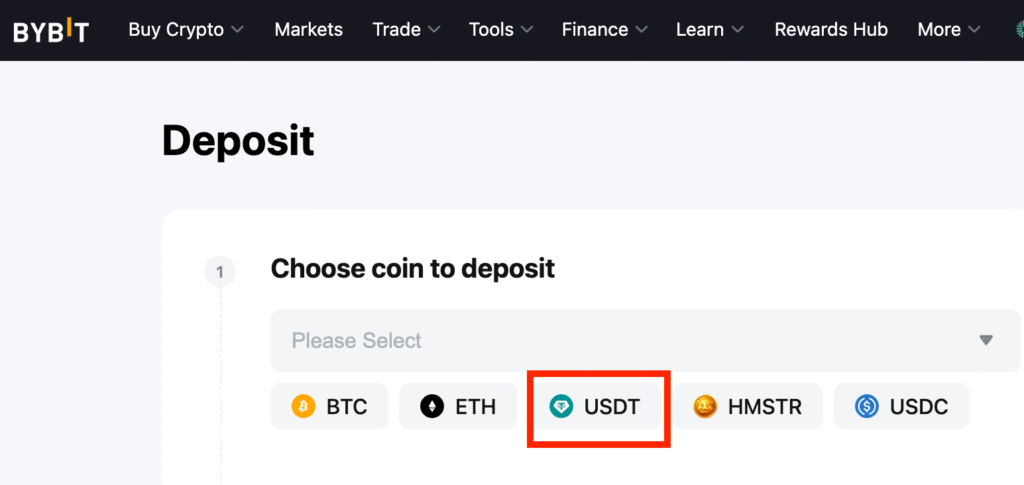
Step 3: Select USDT as the Coin to Deposit
On the Deposit page, select USDT from the list of coins. If it’s not visible, click Please Select and choose USDT (Tether) from the dropdown. This will open the Bybit USDT deposit page, where you can select the correct network.
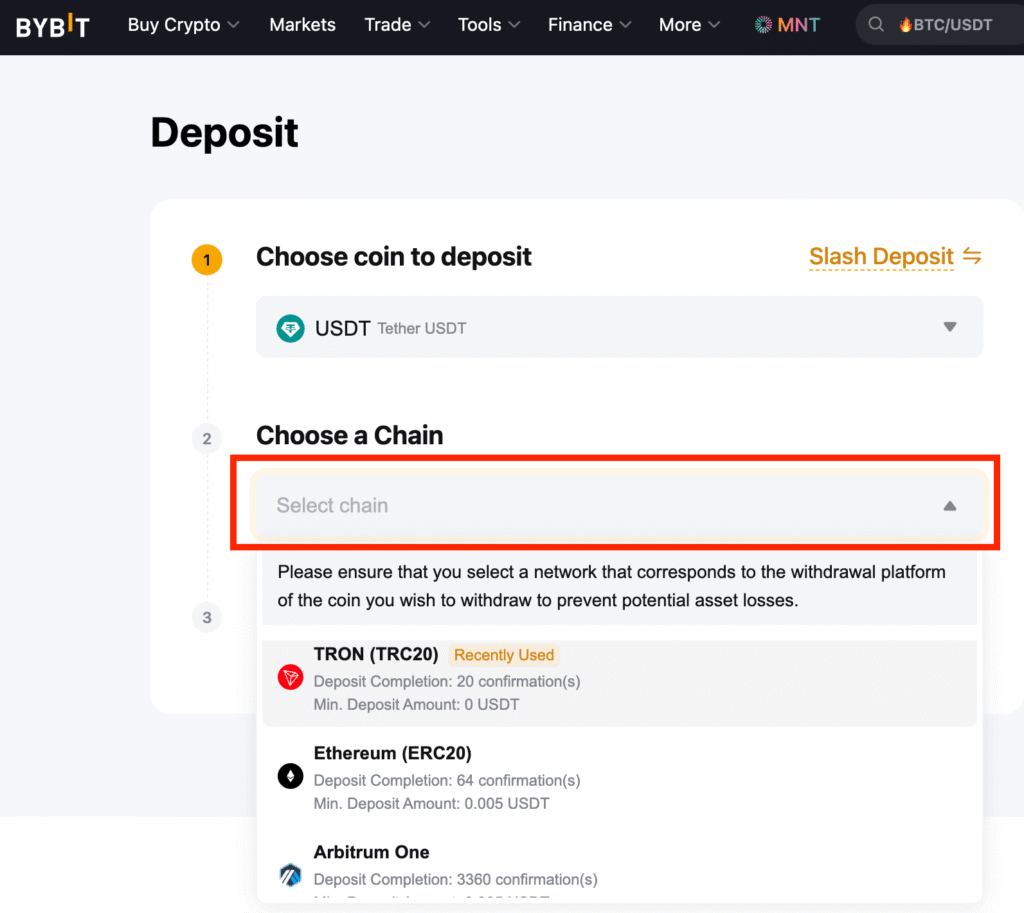
Step 4: Choose the Correct Chain (Network)
This is the most important step. After you select USDT, you’ll see several network options (TRC20, ERC20, BEP20, etc.). The network you choose must match the one you use when sending the funds. For example, if you’re withdrawing from Binance and select TRC20 there, you must also select TRC20 on Bybit. If the networks don’t match, your USDT may not arrive.
Personally, I usually choose TRC20 when depositing USDT on Bybit because it’s fast and easy. If you’re not sure which network to use, this is generally a good option.
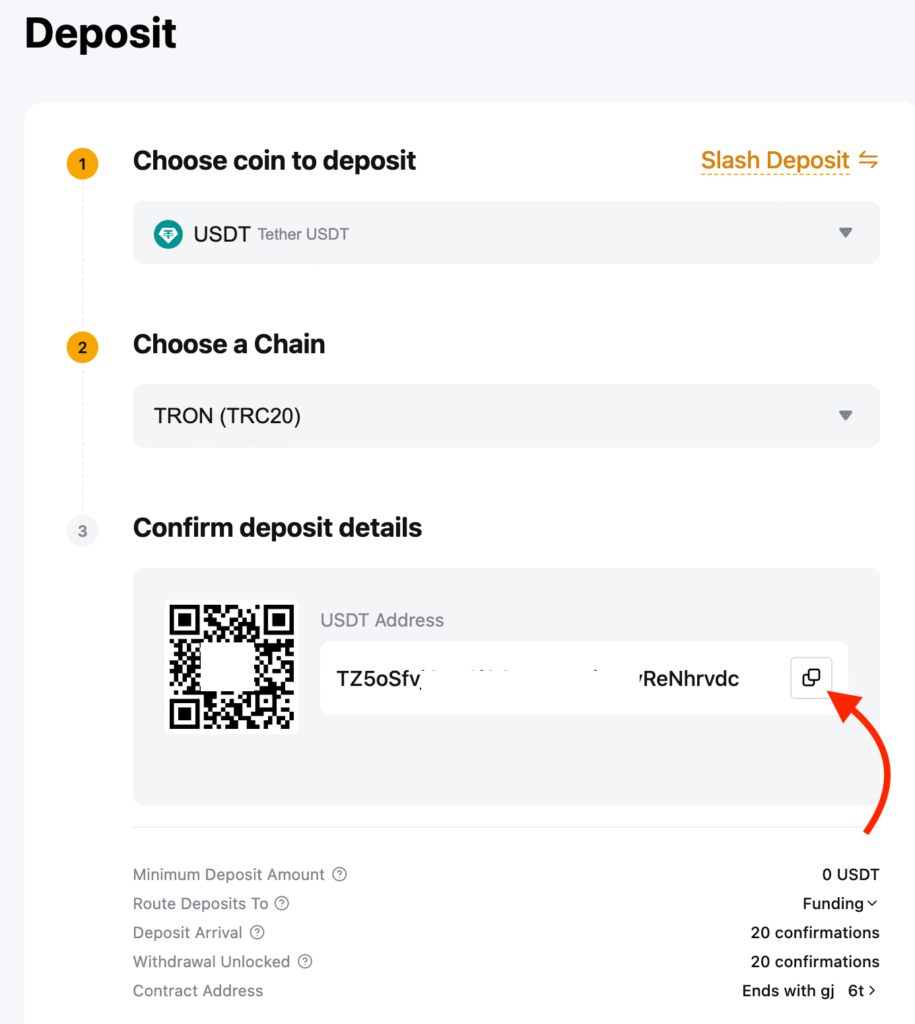
Step 5: Copy Your USDT Deposit Address
After selecting the correct network, your Bybit USDT address will appear. You can copy it by clicking the Copy button or by scanning the QR code. Do not type the address manually. Copying it or scanning the QR code prevents mistakes.
Step 6: Deposit USDT from Your Wallet or Exchange
After copying your Bybit USDT address, open the wallet or exchange where your USDT is stored (for example, Binance, Trust Wallet, or Gate)
- Go to the Withdraw or Send section.
- Select USDT as the crypto to send.
- Paste your Bybit USDT address into the Recipient Address field.
- Choose the same network (TRC20, ERC20, or BEP20) that you selected on Bybit.
- Enter the USDT amount you want to send.
- Click Withdraw to complete the transaction.
Pro Tip: For your first USDT transfer, send a small amount to test the process. Once it reaches your Bybit account safely, you can send the rest.
If you’re new to crypto and want help avoiding expensive mistakes, learn more about my beginner crypto coaching here.
How to Send USDT from Binance to Bybit (Example 1)
Below is a real example of how to send USDT from Binance to Bybit. The steps are very similar on other exchanges, but this shows you exactly what to click in Binance.
Step 1: Log in to Binance
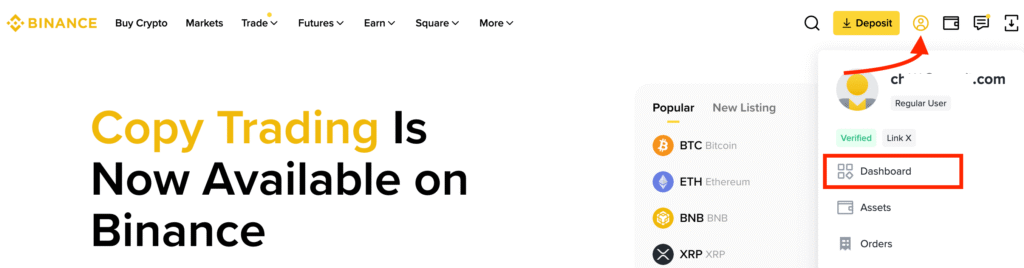
First, log in to your Binance account. In the top right corner, hover over your Profile Icon and click Dashboard to see your account overview.
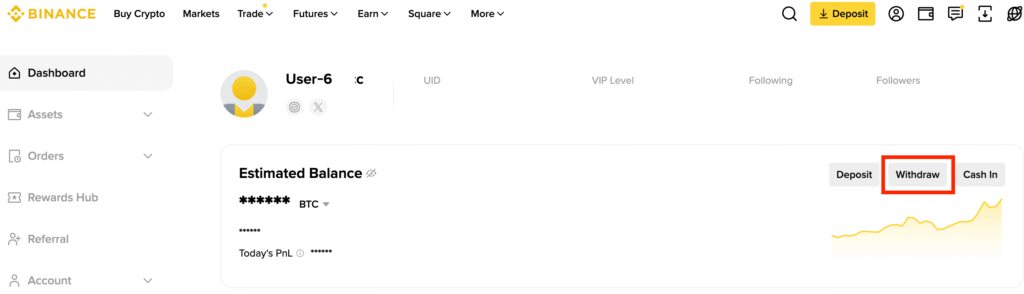
Step 2: Open the Withdraw Page
On your dashboard, click Withdraw. You’ll be taken to the withdrawal page, where you can send USDT from Binance to Bybit.
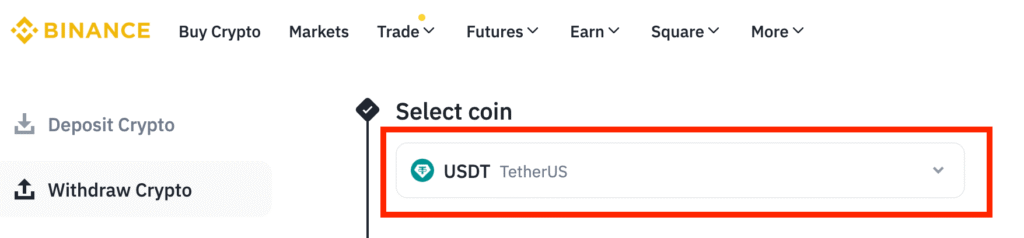
Step 3: Choose USDT as the Coin to Send
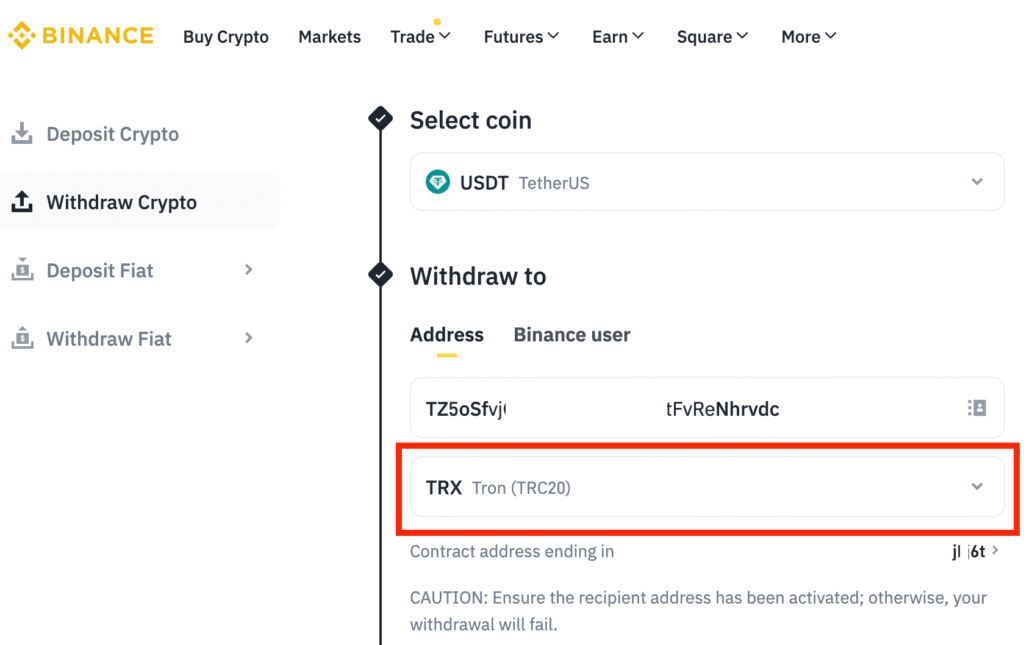
On the withdrawal page, search for and select USDT (TetherUS) as the cryptocurrency you want to send.
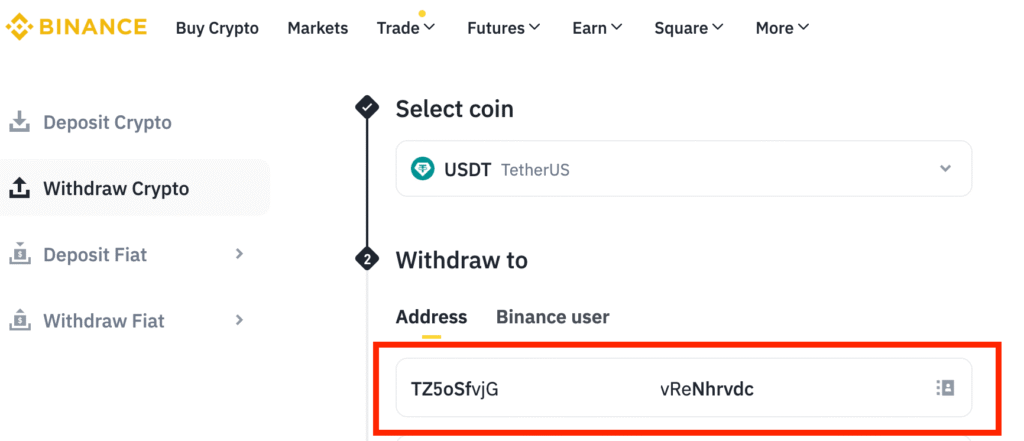
Step 4: Paste Your Bybit Deposit Address
After selecting USDT, you’ll see an Address field. Paste the USDT deposit address you copied from Bybit earlier. Make sure you always paste the address instead of typing it. Then double-check that the first and last few characters match your Bybit address.
Step 5: Select the Correct Network
Next, choose the network (Chain) and make sure it’s the same one you selected on Bybit. For example, if you picked TRC20 on Bybit, select TRC20 on Binance. If the networks don’t match, your USDT may not arrive.
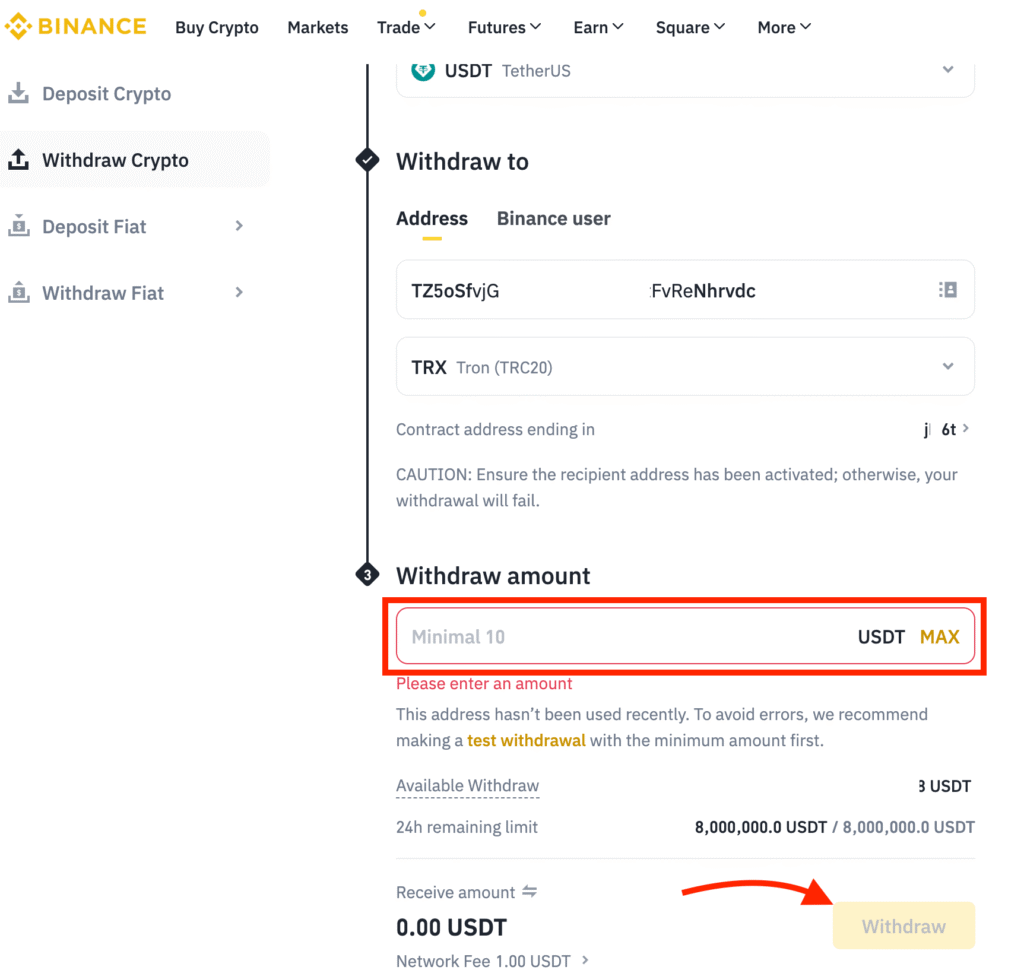
Step 6: Enter Amount and Confirm
Enter the USDT amount you want to send. Then carefully review the USDT address, network, and amount. If everything looks correct, click Withdraw to complete your transfer from Binance to Bybit.
Step 7: Wait for the Deposit to Arrive
After confirming, Binance will process the transaction. The deposit usually arrives in your Bybit account within 10 minutes. That’s all there is to it!
If you want to deposit from Binance, check out my full step by step guide here. For other exchanges, the steps are basically the same. Just select USDT, make sure the network matches, paste your Bybit address, and confirm the transaction.
How to Send USDT from Trust Wallet to Bybit (Example 2)
Here’s how to send USDT from Trust Wallet to Bybit. If you’re using a different wallet, the steps will be very similar.
Step 1: Open Trust Wallet
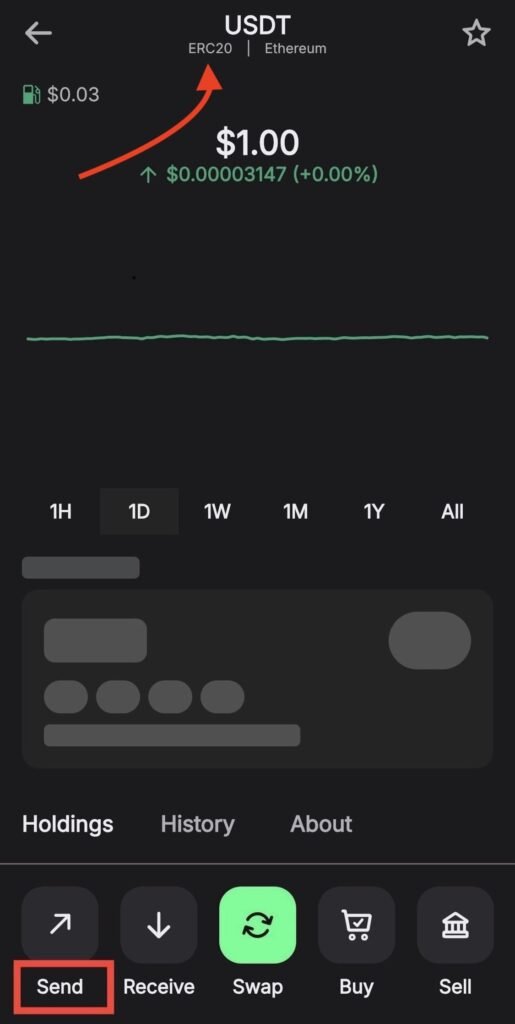
Open the Trust Wallet app. On the main screen, select USDT from your list of coins.
Step 2: Tap Send
After opening USDT, tap Send. This opens the screen where you can paste your USDT deposit address. But before you proceed, check which network your USDT is on. For example, if your USDT in Trust Wallet is on ERC20, make sure your Bybit deposit address is also ERC20.
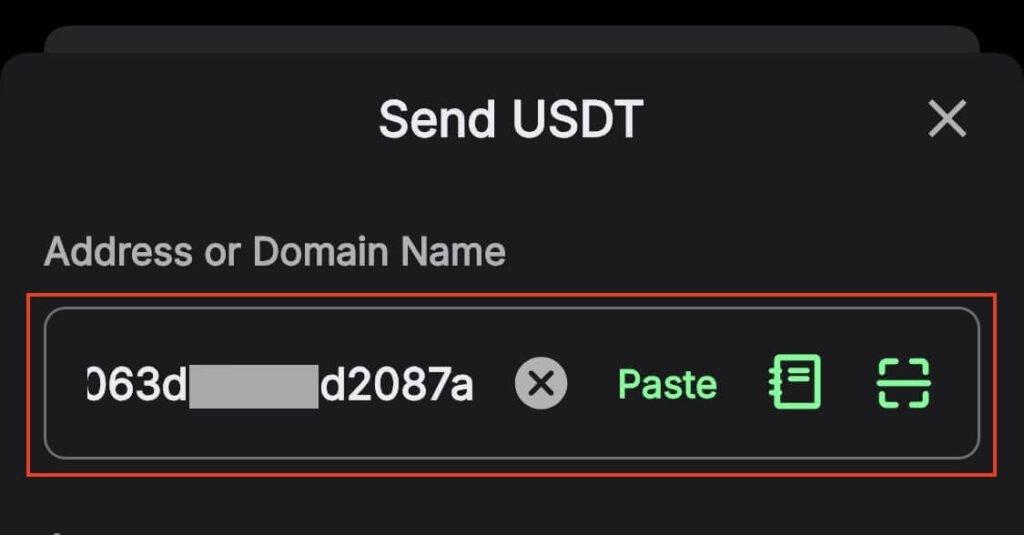
Step 3: Paste Your Bybit Deposit Address
Paste the USDT deposit address you copied from Bybit into the Address field. After pasting, look at the first and last few characters to make sure they match your Bybit address.
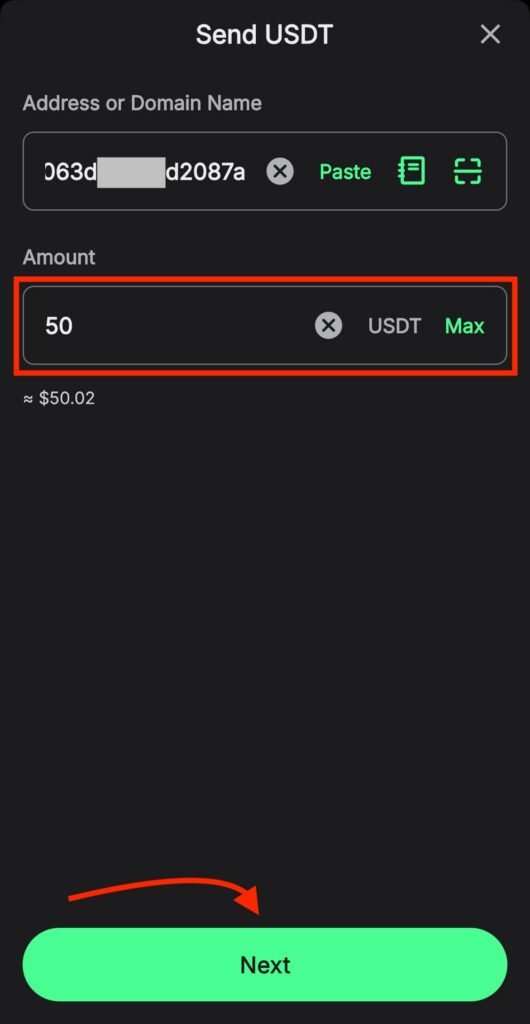
Step 4: Enter Amount to Send
Enter the USDT amount you want to send and tap Next. If this is your first time sending USDT to Bybit, start with a small amount.
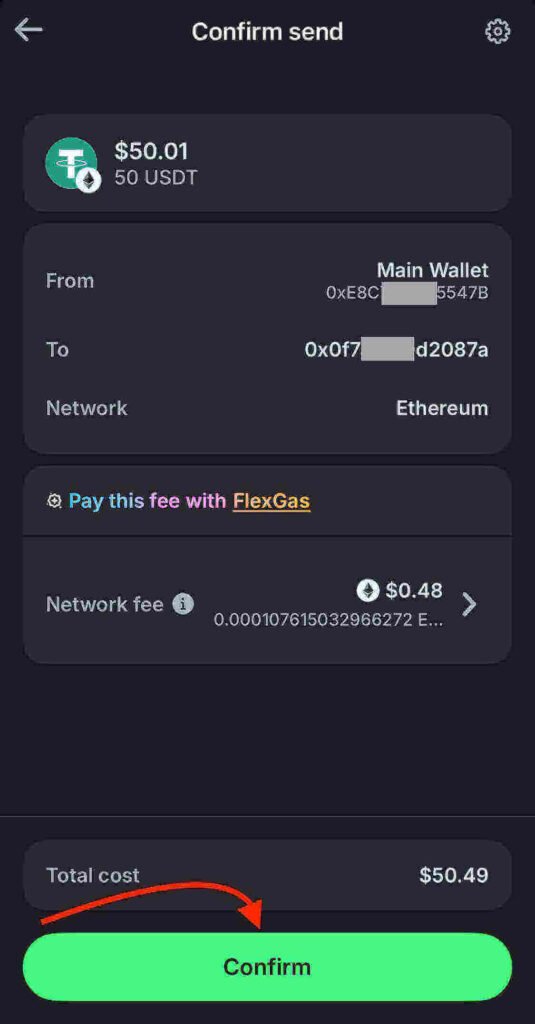
Step 5: Review and Confirm
Carefully review the USDT address, the network, and the amount. If everything is correct, then tap Confirm to send your USDT from Trust Wallet to Bybit.
Biggest USDT Deposit Mistakes on Bybit (And How to Avoid Them)
Here are the most common mistakes to avoid when depositing USDT on Bybit:
- Not Sending a Small Test Transfer First: Many beginners send the full amount right away. If it’s your first time depositing to Bybit, send a small test amount first. Once it arrives in your Bybit account, you can transfer the rest confidently.
- Choosing the Wrong USDT Network: The network must match on both the sending and receiving sides. For example, USDT on ERC20 must be sent to an ERC20 address. A network mismatch can result in permanent loss of funds.
- Pasting the Wrong USDT Address: Always copy your USDT deposit address directly from your Bybit account. After pasting, check that the first and last characters match to ensure accuracy.
- Using Unofficial Websites: Always access Bybit through the official website or mobile app. Double-check the URL before logging in and before copying a deposit address to avoid sending USDT to the wrong place.
Avoid these mistakes, and you’ll be able to deposit USDT on Bybit safely.
Conclusion
Depositing USDT on Bybit is easy once you know which network to choose. Most beginner mistakes come from rushing or skipping key checks.
With that in mind, start with a small transfer and wait for it to show up in your Bybit account. Once it does, you can send larger amounts with confidence.
Ready to deposit USDT on Bybit? Create your Bybit account here and follow the steps above to deposit safely.
FAQs
Additional Resources:
- How to Create a Bybit Account and Get Your Welcome Bonus
- How to Convert USDT to Any Other Crypto on Bybit
- Best Networks to Use When Sending USDT
- 5 Common Mistakes to Avoid When Sending Crypto
And guess what? We’re also on Instagram and X (Twitter). Join us there for even more fun and useful content!
DISCLAIMER:
The information provided here is for informational purposes only. Do not rely solely on it for making investment decisions. It is not financial, tax, legal, or accounting advice. Always do your own research or consult a financial advisor before investing in cryptocurrency.